How to use basic timber skills in your project!
To ensure you can fully realise your ideas it is important to experiment with different techniques and today your teacher will be taking you through how to make a simple timber stand with moveable arm - see image below.
Step 1: Marking out
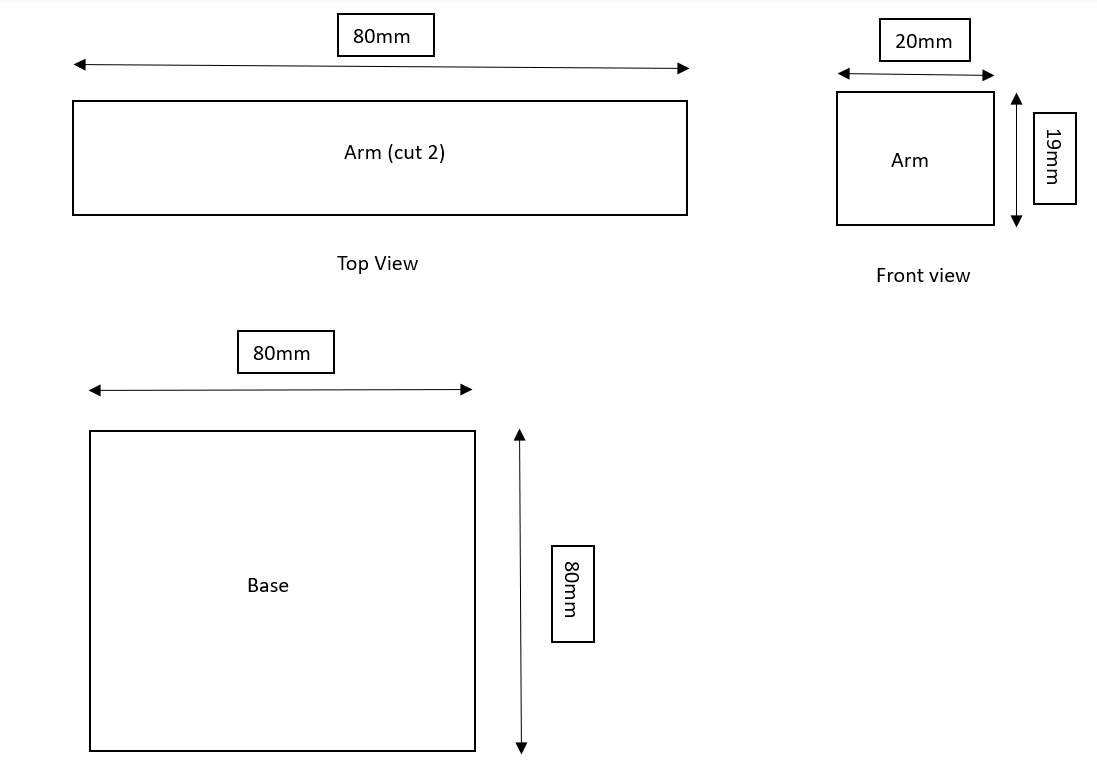
Above are the cutting plans with measurements for this project
Equipment needed:
- Set square
- Ruler
- Pencil and rubber
- Collect timber from teacher - you need ONE long piece for your arms and your base piece of timber
- Mark an 80mm length on your arm piece and square off using set square.
- Mark a 5mm cutting channel, starting from your 80mm mark and square off using set square.
- Mark another 80mm cutting channel, starting from your 5mm cutting channel - this will end up being the entire length of timber if you have measured correctly.
- Project your marks on all faces of the timber - see video for visual explanation
- Grab the base piece
- Mark the centre of the of your base piece
- Measure the width of of your arm and mark the measurement on your centre line. See video for visual explanation.
- Square of your marks using your set square.
- Mark the depth of your timber and square off - the end result should look like a basketball court.
- Ensure you have projected your marks onto the edge and back piece and you are done.
Step 2: Cutting your arm
Equipment needed:
- Bench hook, Marked out timber, Tennon saw
- Lock bench hook into bench vice
- Place your timber onto the bench hook
- Lock piece of timber in place with weight of your non-dominant arm - your dominant arm will be used to cut using the Tennon saw.
- Gently pull the saw towards you to create a cutting channel - ensure that you are cutting straight.
- Cut through material
